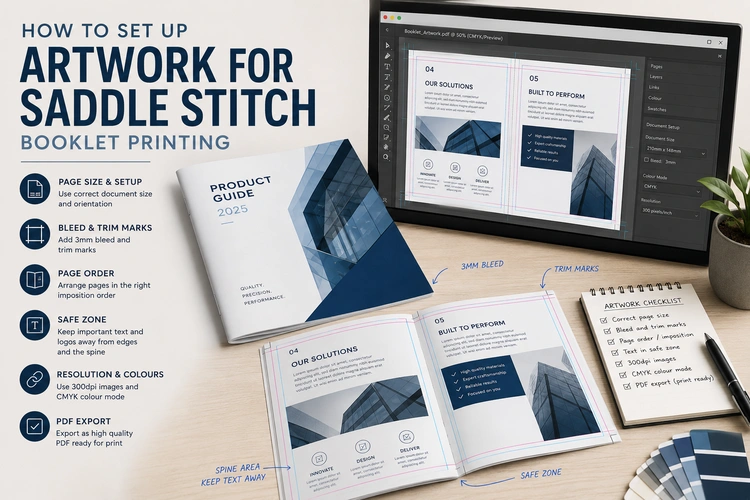
Getting your artwork right before you upload it saves time, avoids reprints, and means what arrives matches what you designed. When you’re ordering saddle-stitched booklets, the file requirements are consistent regardless of which software you use — but each tool has its own way of meeting them, and a few have quirks that catch people out. This guide covers everything from the non-negotiable rules through to step-by-step export settings in InDesign, Affinity Publisher, and Canva.
These constraints come from how saddle stitch booklets are physically produced, not from printer preference. Understanding why each rule exists makes it much easier to apply consistently.
Page count must be a multiple of four. A saddle-stitched booklet is made from folded sheets. Each sheet, folded in half, creates four printed pages: a front and back on the outer fold, and a front and back on the inner fold. This means your total page count — including the cover — must divide evenly by four. Eight, twelve, sixteen, twenty, and so on. If your content runs to, say, fourteen pages, you need to either add two pages or cut two. The most common approach is to use the inside front cover, inside back cover, or back cover as active design space rather than leaving them blank.
If you haven’t yet confirmed your page count, work that out before you start building your document — our guide to booklet page counts and sizes covers how to make that decision.
Supply single pages, not spreads. When you read a booklet, you see two pages side by side as a spread. When you supply artwork for printing, each page must be a separate, individually sized page in your PDF. The printer’s imposition software takes your single pages and arranges them into the correct printing order — a process called imposition — which is different from reading order and depends on the total page count. If you supply spreads, the imposition will go wrong. The only exception is the centre spread of the booklet, where a full-bleed image runs continuously across both pages: your printer will advise on how to handle this, but single pages are still the correct default.
Colour mode must be CMYK. Commercial print uses four ink colours — cyan, magenta, yellow, and black — mixed to produce the full range of printed colour. Screen software defaults to RGB (red, green, blue), which has a wider gamut than print can reproduce. If you supply an RGB file, the printer’s system will convert it to CMYK automatically, but the conversion can shift colours — particularly vivid blues, greens, and oranges — in ways that may not match what you saw on screen. Set your document to CMYK from the outset and proof colours in that mode.
Image resolution must be at least 300dpi at final print size. Images that look sharp on screen at 72dpi will print softly. The minimum for clean commercial print reproduction is 300dpi at the size the image will appear on the printed page. If you’re scaling an image up from a smaller original, check the effective resolution at the output size — a 300dpi image scaled to 200% becomes 150dpi and will print noticeably soft.
Bleed and safety margins are the most common source of problems in submitted artwork, and both exist for the same reason: the cutting of printed sheets is mechanical, and mechanical cutting has a small tolerance — typically ±1mm.
Bleed (3mm on all edges). Any element of your design that extends to the edge of the page — a background colour, a full-bleed photograph, a coloured border — must extend 3mm beyond the trim line into the bleed area. If it stops at the trim line exactly, the cutting tolerance means a thin white strip of unprinted paper may appear at the edge of the finished booklet. Extending the artwork into the bleed zone ensures that even if the cut falls 1mm long or short, the design still bleeds cleanly to the edge.
Safety margin (5mm inside the trim line). The inverse of bleed: any element that must not be cut — body text, logos, page numbers, important photographic subjects — should sit at least 5mm inside the trim line. The spine edge deserves extra attention. In a saddle-stitched booklet the spine is stapled and folded, and the pages nearest the spine are slightly compressed. Keep important content 8–10mm away from the spine edge, particularly on inner pages.
A practical way to think about it: bleed takes your design 3mm outside the page; the safety margin keeps your content 5mm inside it. The trim line sits between them, and anything that matters to the design must be clear of it in both directions.
InDesign is the most reliable tool for multi-page print documents, and its settings map directly to what commercial printers need.
Document setup. Create a new document at the finished trim size of your booklet — for an A5 booklet, 148 × 210mm. Set the number of pages to your total page count. Crucially, turn off Facing Pages — you’re supplying single pages, not spreads, and having facing pages on can cause confusion when exporting. Set bleed to 3mm on all sides in the Bleed fields. Set the inside margin to at least 8mm to keep content clear of the spine fold; outside, top, and bottom margins can follow your design, but 5mm minimum on all sides is a safe floor.
Colours. Go to Edit > Colour Settings and confirm the document is working in CMYK. If you’re using swatches, verify none are set to RGB or Spot unless you’re specifically using spot colours (which require a separate conversation with your printer).
Exporting to PDF. Go to File > Export and choose Adobe PDF (Print). In the export dialog, use the PDF/X-1a or PDF/X-4 preset as your starting point — both are widely accepted by UK commercial printers. Under Marks and Bleeds, check Use Document Bleed Settings and enable crop marks. Under Output, confirm Colour Conversion is set to Convert to Destination and the destination profile is an appropriate CMYK press profile (ISO Coated v2 is a widely used standard for European litho printing). Export as Pages, not Spreads.
Affinity Publisher handles print documents well and produces clean press-ready PDFs. The workflow mirrors InDesign closely, with a few points worth calling out.
Document setup. Create a new document at your finished trim size. In the Document Setup panel, enter 3mm bleed on all four sides. Disable Facing Pages in the same panel — the toggle is easy to miss. Set your margins with at least 8mm on the spine (left margin for standard portrait orientation) and 5mm minimum on the remaining three sides.
Colours. Affinity Publisher defaults to an RGB colour space in many templates. Go to File > Document Setup > Colour and switch the Colour Format to CMYK and set an appropriate ICC profile. Do this before placing any images or building any colour swatches, as changing it later can shift values. Placed images in RGB will be converted on export — acceptable, but setting CMYK from the start gives you more predictable results.
Exporting to PDF. Go to File > Export and choose PDF. Select the PDF (for print) option. Under the More tab, verify that Rasterise is set to Nothing (or Unsupported Properties only) and that the colour space is CMYK. Enable Bleed (use document bleed) and enable crop marks. A common Affinity pitfall: the default export dialog does not always show the bleed settings — make sure you expand all sections before exporting, or your PDF will export without bleed even if it was set up correctly in the document.
Canva is a legitimate option for booklet design, particularly for teams without dedicated design software. It has real limitations for print work, but they’re manageable if you know what they are.
The core limitations. Canva works natively in RGB and does not have a true CMYK design environment. It also has no built-in bleed area in most workflows — you have to simulate it manually. Image resolution is constrained by what you upload; Canva will not warn you if an image is below 300dpi at print size. These are not reasons to avoid Canva, but they mean the pre-upload checklist matters more than with InDesign or Affinity.
Simulating bleed in Canva. Set your canvas size to 3mm larger on each side than your finished trim size. For an A5 booklet (148 × 210mm), set the canvas to 154 × 216mm. Design so that background colours and full-bleed images extend to the edge of this enlarged canvas. Important content should stay at least 8mm inside the edge. You won’t have a visible trim line as a guide — work from the measurements.
Exporting from Canva. Download as PDF Print (not PDF Standard, which compresses quality). In the download options, enable Crop Marks and Bleed if the option appears — it does in Canva Pro. Check that the resulting PDF shows bleed extending beyond the visible page area. If bleed marks are not available in your Canva plan, the oversized canvas approach above achieves the same result, and your printer’s prepress team can apply crop marks during imposition.
What to check before uploading. Open the downloaded PDF in a PDF viewer and zoom in on images at 100% — if they look soft at screen scale, they will print soft. Check that any background colours extend to the edge of the PDF page. Verify that no text or logos sit within 8mm of any edge.
Page creep is one of the more unintuitive aspects of saddle stitch booklets, and it’s worth understanding even if it only becomes relevant for higher page counts.
When folded sheets are nested inside each other, each successive inner sheet extends fractionally further toward the outer edge of the booklet than the sheet outside it. After the face trim — the cut that trims all pages to the same width — the innermost pages end up with a slightly narrower outside margin than the outermost pages. On a thin booklet, this difference is negligible. On a 48-page booklet on 150gsm paper, the shift can be 3–4mm at the centre spread — enough to noticeably tighten the outside margin on inner pages, or to clip content that was placed close to the outer edge.
When creep becomes visible. As a practical threshold, creep is rarely a problem on booklets under 32 pages on standard 130gsm inners. Above 40 pages, or on heavier inner stocks, it’s worth factoring in. At 64 pages on 150gsm, it’s a meaningful consideration. For the relationship between page count, paper weight, and what’s practical for saddle stitch, see our booklet paper weight and finish guide.
What the printer does. Professional imposition software can apply creep compensation automatically — progressively shifting inner pages inward during imposition so that margins remain consistent after trimming. Better Printing applies this as part of the production process on qualifying jobs.
What you should do. Keep important content — particularly anything near the outer edge of inner pages — well within the safety margin. If you’re designing a high page-count booklet with prominent outer-edge elements (page numbers in the outer margin, for example), either move them inward or flag the job to your printer before uploading so they can confirm creep compensation will be applied. For most commercial booklets under 40 pages, designing to a consistent 5–8mm outer margin is sufficient.
Work through this before uploading your file. It takes two minutes and catches the mistakes that cause delays.
Once your file is ready, you can upload artwork directly when ordering your saddle-stitched booklets or supply it after checkout. If you’d like your file checked before it goes to press, Better Printing offers an artwork checking service — useful for first-time orders or complex jobs where getting it right first time matters.

